• Laser & Optoelectronics Progress
  • Vol. 57, Issue 21, 211203 (2020)
Ye Han1, Weng Zuxin1, Zhang Yunhai2、*, Miu Jia3, and Xiao Yun2
Author Affiliations
  • 1南昌大学机电工程学院, 江西 南昌 330031
  • 2中国科学院苏州生物医学工程技术研究所江苏省医用光学重点实验室, 江苏 苏州 215163
  • 3江苏省医疗器械检验所, 南京 210019
  • show less
    DOI: 10.3788/LOP57.211203 Cite this Article Set citation alerts
    Ye Han, Weng Zuxin, Zhang Yunhai, Miu Jia, Xiao Yun. Surface Roughness Measurement Using Laser Confocal Microscope with Boundary Area Correction[J]. Laser & Optoelectronics Progress, 2020, 57(21): 211203 Copy Citation Text show less

    Abstract

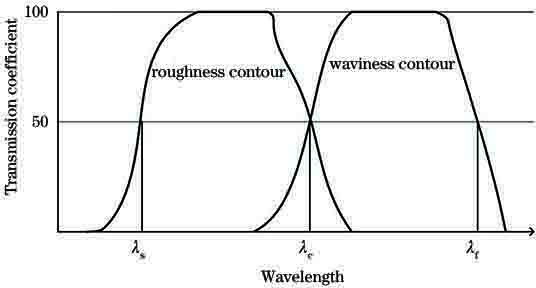
    In order to achieve the non-contact surface roughness measurement of objects with steep contours, we usually use confocal imaging to layer the objects and thus to reconstruct the three-dimensional surface contours of objects. Meanwhile, a Gaussian filter is used to extract the roughness contours from the three-dimensional surface contours. However, the boundary data are missed during the process of filtering and simultaneously the usual simplified extension of two end data of original contours leads to contour distortion. This paper introduces a new type of method for boundary area correction. This correction method can be also useful for parts with large surface radian changes and can be used to accurately extract the roughness contours of objects. Confocal imaging measurements are performed on two sets of actual roughness samples with overall smooth and steep contours. For samples with overall smooth contours, the root mean square error (RMSE) and average roughness obtained by the conventional method are 0.080 and 2.86 μm, respectively, and the error relative to the sample roughness value of 2.94 μm is 2.72%. In contrast, after boundary area correction, the obtained RMSE and average roughness are 0.090 and 2.85 μm, respectively, and the error relative to the sample roughness value is 3.06%. The roughness of the sample with an overall sharp contour is 3.2 μm, and the RMSE and average roughness obtained by the conventional method are 0.120 and 3.31 μm, respectively. The error relative to the sample roughness value is 3.48%, and after boundary area correction, the RMSE and average roughness are 0.045 and 3.19 μm, respectively. The error relative to the sample roughness value is 0.31%. The research results confirm that this method can accurately measure the surface roughness of objects with overall steep contours and can provide a certain reference to the development of laser confocal roughness measurement equipment.
    Ye Han, Weng Zuxin, Zhang Yunhai, Miu Jia, Xiao Yun. Surface Roughness Measurement Using Laser Confocal Microscope with Boundary Area Correction[J]. Laser & Optoelectronics Progress, 2020, 57(21): 211203
    Download Citation