• Chinese Journal of Lasers
  • Vol. 46, Issue 7, 0704004 (2019)
Juyou Du1、2, Fengzhao Dai1、2、**, and Xiangzhao Wang1、2、*
Author Affiliations
  • 1 Laboratory of Information Optics and Optoelectronic Technology, Shanghai Institute of Optics and Fine Mechanics, Chinese Academy of Sciences, Shanghai 201800, China
  • 2 Center of Materials Science and Optoelectronics Engineering, University of Chinese Academy of Sciences,Beijing 100049, China
  • show less
    DOI: 10.3788/CJL201946.0704004 Cite this Article Set citation alerts
    Juyou Du, Fengzhao Dai, Xiangzhao Wang. Calibration Method for Alignment Error Caused by Asymmetric Deformation of Mark and Its Application in Overlay Measurement[J]. Chinese Journal of Lasers, 2019, 46(7): 0704004 Copy Citation Text show less
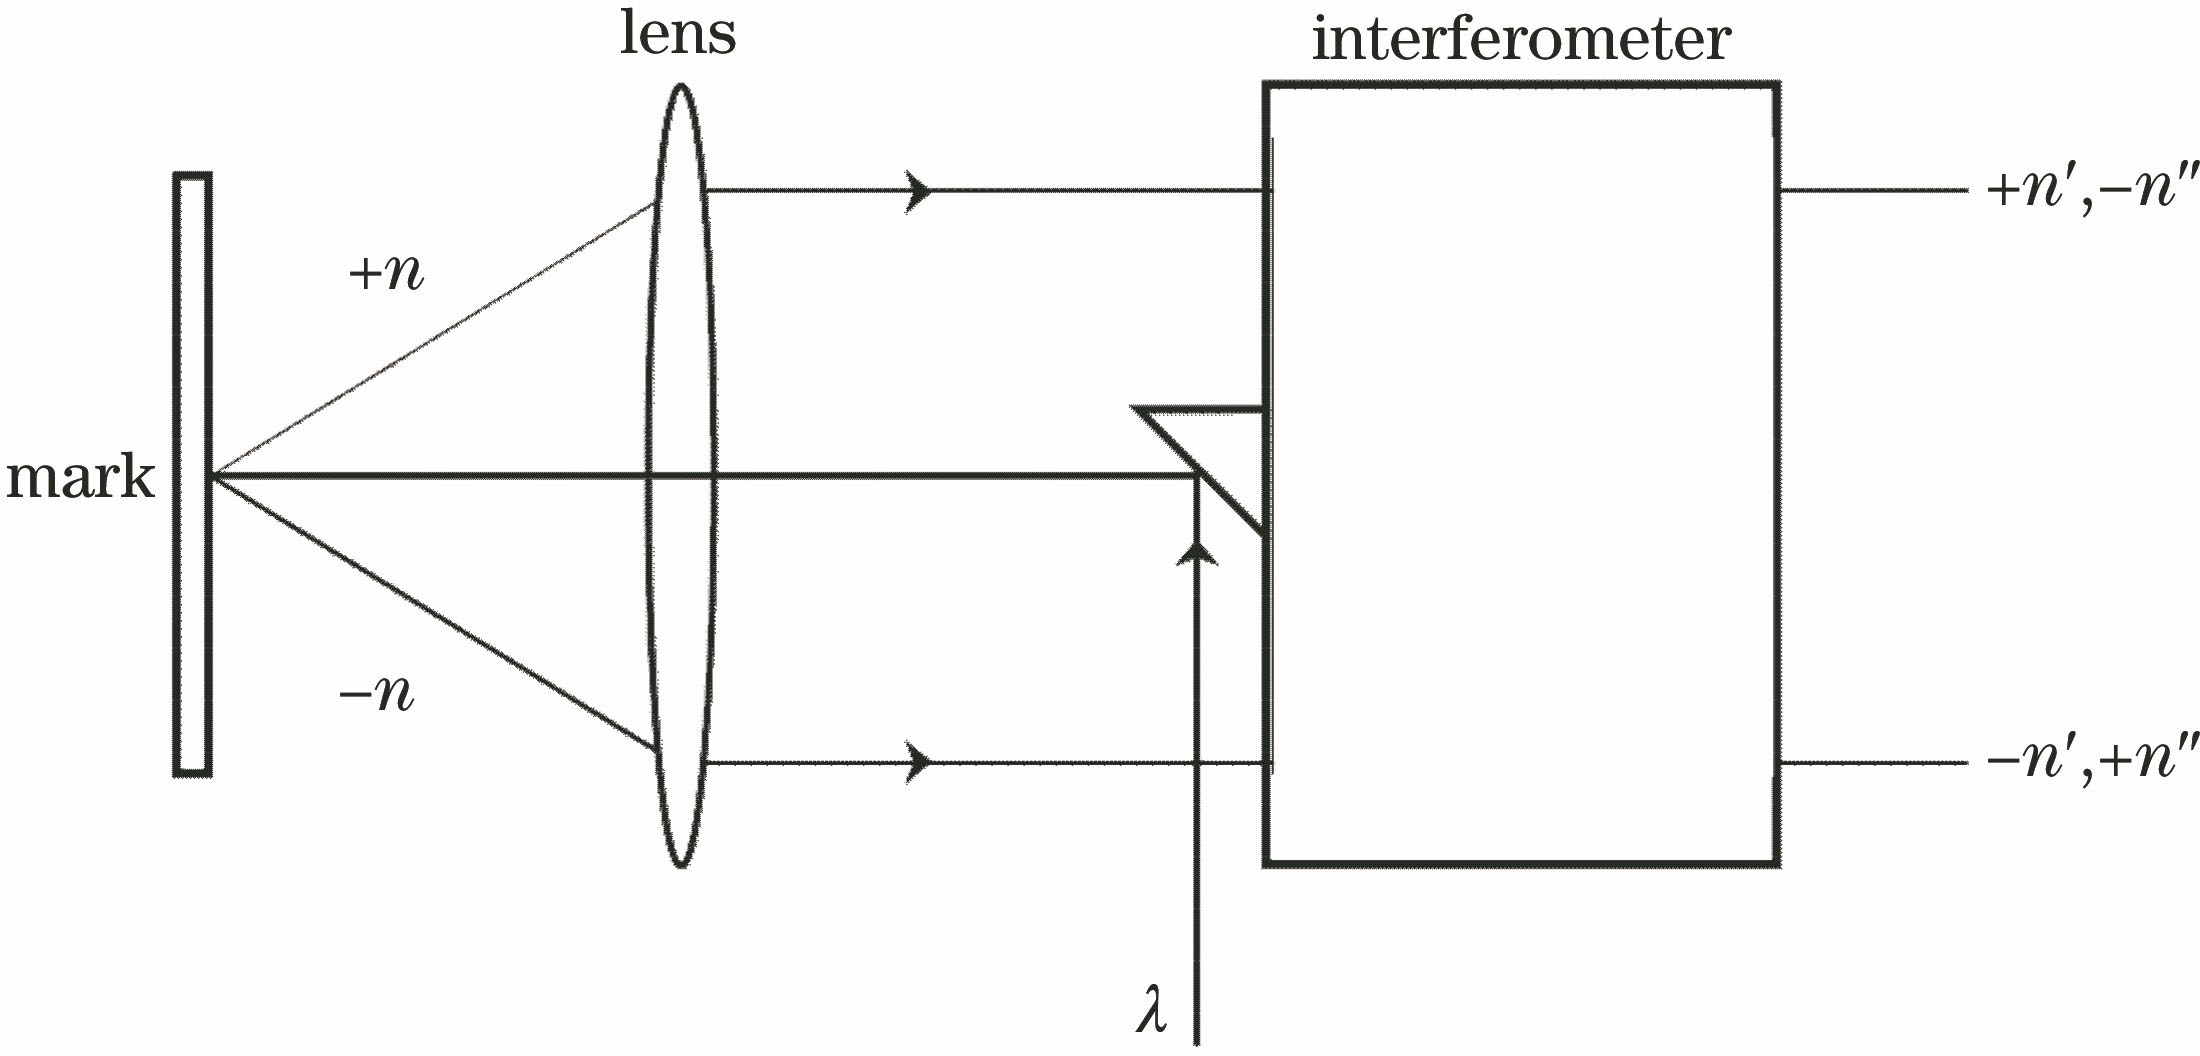
    Principle diagram of SMASH alignment technique
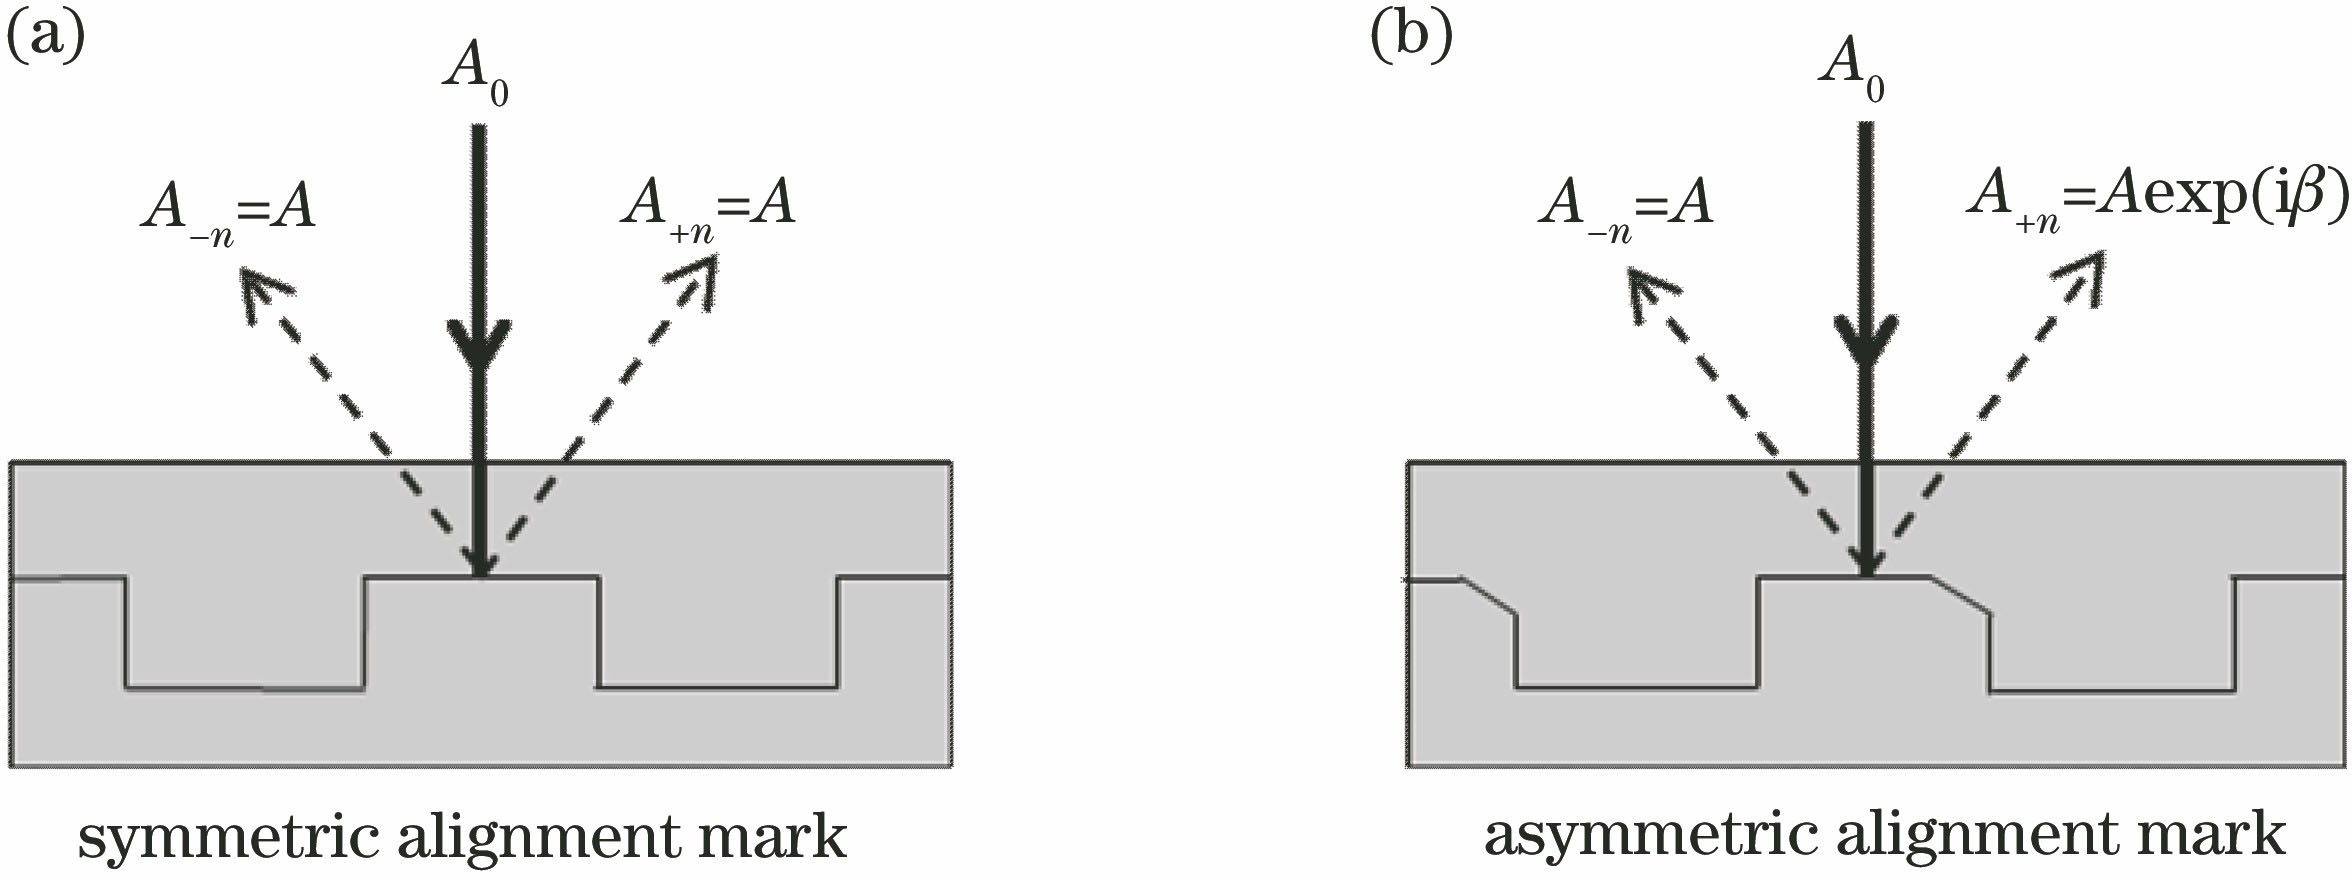
    Fig. 1. Principle diagram of SMASH alignment technique
    Beam diffraction diagrams of different alignment marks. (a) Symmetric alignment mark; (b) asymmetric alignment mark
    Fig. 2. Beam diffraction diagrams of different alignment marks. (a) Symmetric alignment mark; (b) asymmetric alignment mark
    Simulation model of alignment mark
    Fig. 3. Simulation model of alignment mark
    Asymmetric alignment marks with different shapes. (a) Round shape; (b) wedge shape
    Fig. 4. Asymmetric alignment marks with different shapes. (a) Round shape; (b) wedge shape
    Alignment measurement errors as functions of deformations of different asymmetric alignment marks under illuminations with different wavelengths and polarizations. (a) Round shape; (b) wedge shape
    Fig. 5. Alignment measurement errors as functions of deformations of different asymmetric alignment marks under illuminations with different wavelengths and polarizations. (a) Round shape; (b) wedge shape
    Simulation results. (a) Ra-Rb as a function of Rb; (b) Wa-Wb as a function of Wb
    Fig. 6. Simulation results. (a) Ra-Rb as a function of Rb; (b) Wa-Wb as a function of Wb
    Alignment measurement errors caused by asymmetric alignment marks with different shapes after calibration. (a) Round shape; (b) wedge shape
    Fig. 7. Alignment measurement errors caused by asymmetric alignment marks with different shapes after calibration. (a) Round shape; (b) wedge shape
    Principle diagrams of overlay precision measurement based on DBO technique. (a) eoverlay0
    Fig. 8. Principle diagrams of overlay precision measurement based on DBO technique. (a) eoverlay<0; (b) eoverlay=0; (c) eoverlay>0
    Overlay measurement error caused by asymmetric deformation of overlay mark
    Fig. 9. Overlay measurement error caused by asymmetric deformation of overlay mark
    Simulation model of overlay mark
    Fig. 10. Simulation model of overlay mark
    Overlay measurement error as a function of deformation of different asymmetric overlay marks under illuminations with different wavelengths and polarizations. (a) Round shape; (b) wedge shape
    Fig. 11. Overlay measurement error as a function of deformation of different asymmetric overlay marks under illuminations with different wavelengths and polarizations. (a) Round shape; (b) wedge shape
    Overlay measurement error as a function of alignment measurement error caused by different asymmetric deformations. (a) Round shape; (b) wedge shape
    Fig. 12. Overlay measurement error as a function of alignment measurement error caused by different asymmetric deformations. (a) Round shape; (b) wedge shape
    Simulation results of overlay measurement errors caused by asymmetric overlay marks with different shapes after calibration. (a) Round shape; (b) wedge shape
    Fig. 13. Simulation results of overlay measurement errors caused by asymmetric overlay marks with different shapes after calibration. (a) Round shape; (b) wedge shape
    MaterialRefractive index
    532 nm632.8 nm775 nm850 nm
    Si4.1520+0.05179i3.8823+0.01959i3.7139+0.00799i3.6730+0.00500i
    SiO21.46071.45701.45411.4525
    Table 1. Refractive indexes with alignment mark materials under different wavelengths
    MaterialRefractive index
    400 nm500 nm600 nm700 nm
    Si5.5674+0.3860i4.2992+0.0704i3.9485+0.0274i3.6730+0.0122i
    Copolymer resist1.49611.48641.48271.4809
    SiO21.47011.46231.45801.4553
    Table 2. Refractive indexes of overlay mark materials under different wavelengths
    Juyou Du, Fengzhao Dai, Xiangzhao Wang. Calibration Method for Alignment Error Caused by Asymmetric Deformation of Mark and Its Application in Overlay Measurement[J]. Chinese Journal of Lasers, 2019, 46(7): 0704004
    Download Citation